Adding Field Options
This topic describes how to add field options to a company or a site. Field options allow you to set properties on shipping fields within the ShipExec Thin Client.
- On the ShipExec Management Studio home page, click Companies.
- From the Companies page, do one of the following:
- To add field options at the company level, click the
 icon for the company for which you want to add field options.
- To add field options at the site level, click the icon for the company, then click the Sites tab, and then click the icon for the site for which you want to add field options.
- To add field options at the company level, click the
- Click the Profiles tab. The Profiles page displays.
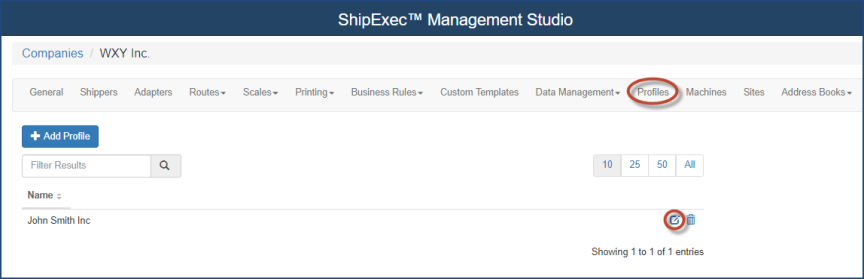
- Click the icon for the profile to which you want to add field options.
- Click the Field Options tab.
- Click the Field Option Properties you want. The Field Options page displays. (Note: This illustration uses the Package Properties as an example).
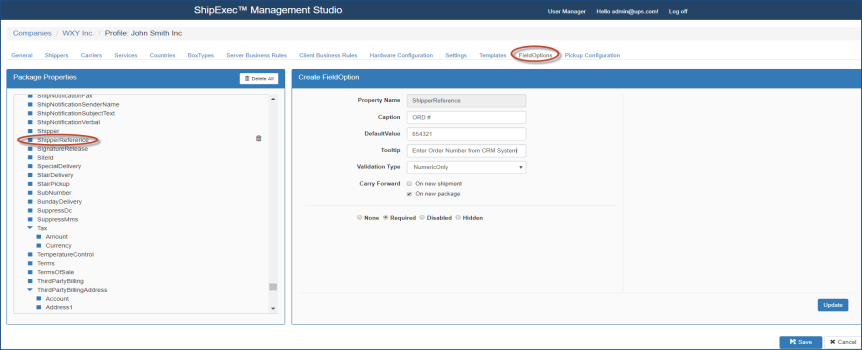
- In the Package Properties panel, click the package you want to configure. (Note: This illustration uses Shipper Reference as an example.)
- In the Caption box, type the new property name label.
- In the Default Value box, type the field option default value.
- In the Tooltip box, type the tip you want to display when someone hovers over the field.
- From the Validation Type drop-down list, select the validation type you want:
- Regular Expression - Lets you define your validation expression.
- AlphaNumericOnly - Allows only alpha and numeric values.
- NumericOnly - Allows only numeric values.
- ValidationList - Provides a list from which users can choose.
- ValidationListDropDown - Provides a drop-down of different options.
- Email - Must have proper email format.
- Select the appropriate Carry Forward check box:
- On new shipment - Management Studio will use whatever default value you have at ship time.
- On new package - Management Studio will use whatever value you have on the package you are working with.
- Select the appropriate option button (None, Required, Disabled, Hidden).
- Click Add to Profile. The "Successfully added to profile " message displays at the bottom of the page.
- Click Save. Management Studio adds a
 icon next to the field option.
Related Topics